I recently ran across a blog entry entitled Neo4j 1.9.M01 – Self-managed HA. I found the concept of graph databases storing data really interesting and reached out to the guys at Neo4j to get some insight on how to deploy their HA solution on Eucalyptus. Amongst the resources that they provided, they shared this little gem – how to deploy Neo4j on EC2. In order to run first, you need to know how to walk – so before going down the path of standing up HA Neo4j, I decided to be influenced by the DIY on EC2 article provided by Neo4j and deploy Neo4j on Eucalyptus – with a little help from Cloud-Init. The follow-up blog will show how to use the same setup, and deploy an HA Neo4j environment.
The Setup
Eucalyptus
The Eucalyptus cloud I used is configured using Eucalyptus High-Availability. Its running on CentOS 6.3, running KVM. Its also running in Managed networking mode, so that we can take advantage of network isolation of the VMs, and the use of security groups – interacting very much in the same way as its done in the security groups provided in AWS EC2.
Ubuntu cloud images come pre-packaged with cloud-init, which helps with bootstrapping the instance.
I wanted to have the solution work on AWS EC2 and Eucalyptus; since Ubuntu cloud images work on both, its a great choice.
Registering the Ubuntu Cloud Image with Eucalyptus
In order for us to get started, we need to get the Ubuntu Cloud image into Eucalyptus so that we can use it for our instance. To upload, bundle and register the Ubuntu Cloud image, ramdisk and kernel, do the following:
$ tar -zxvf precise-server-cloudimg-amd64.tar.gz
x precise-server-cloudimg-amd64.img
x precise-server-cloudimg-amd64-vmlinuz-virtual
x precise-server-cloudimg-amd64-loader
x precise-server-cloudimg-amd64-floppy
x README.files
We need to bundle, upload, and register precise-server-cloudimg-amd64-loader (ERI), precise-server-cloudimg-amd64-vmlinuz-virtual (EKI), and precise-server-cloudimg-amd64.img (EMI). For more information regarding this, please refer to the “Image Overview” section of the Eucalyptus 3.1 User Guide.
After bundling, uploading and registering the ramdisk, kernel and image, the latest-ubuntu-precise bucket in Walrus should have the following images:
$ euca-describe-images | grep latest-ubuntu-precise
IMAGE eki-0F3937E9 latest-ubuntu-precise/precise-server-cloudimg-amd64-vmlinuz-virtual.manifest.xml 345590850920 available public x86_64 kernel instance-store

IMAGE emi-C1613E67 latest-ubuntu-precise/precise-server-cloudimg-amd64.img.manifest.xml 345590850920 available public x86_64 machine instance-store

IMAGE eri-0BE53BFD latest-ubuntu-precise/precise-server-cloudimg-amd64-loader.manifest.xml 345590850920 available public x86_64 ramdisk instance-store
Cloud-init Config File
Now that we have the image ready to go, we need to create a cloud-init config file to pass in using the –user-data-file option that is part of euca-run-instances. For more examples of different cloud-init files, please refer to the cloud-init-dev/cloud-init repository on bazaar.launchpad.net. Below is the cloud-init.config file I created for bootstrapping the instance with an install of Neo4j, using ephemeral disk for the application storage, and installing some other packages (i.e. latest euca2ools, mlocate, less, etc.). The script can be also accessed from github as well – under the eucalptus/recipes repo.
Next, we need to create a security group for our instance. To create a security group, use euca-create-group. To open any ports you need for the application, use euca-authorize. The ports we will open up for the Neo4j application are SSH (22), ICMP, HTTP( 7474), and HTTPS (7473).
Create security group:
# euca-create-group neo4j-test -d "Security for Neo4j Instances"
Because I added in the cloud-init config file to do an “apt-get upgrade”, it takes about 5 to 7 minutes until the instance is fully configured and Neo4j is running. Once you have it running, go to https://<ip-address of instance>:7473. It will direct you to the web administration page for monitoring and management of the Neo4j instance. In this example, the URL will be https://euca-192-168-55-104.wu-tang.euca-hasp.eucalyptus-systems.com:7473
Neo4j Monitoring and Management Tool
Thats it! The cool thing about this too, is that you can find an Ubuntu Precise AMI on AWS EC2, use the same cloud-init script, use euca2ools, and follow these instructions to get the same deployment on AWS EC2.
As mentioned before, the follow-up blog will be how to deploy the HA solution of Neo4j on Eucalyptus. Enjoy!
Recently, I had the opportunity to sit in on a few meetings at Eucalyptus Systems, Inc. discussing Elastic Load Balancing implementation ideas for Eucalyptus 3.3. Elastic Load Balancing is under the “Future Development Directions” on the Eucalyptus Cloud Roadmap. Part of my involvement was to evaluate the Zen Load Balancer. The first question that I asked myself was “Can this open source load balancer appliance be tested in the cloud?” I figured this would be a great way to not only test the appliance, but also give some insight as to how users would expect to interact with the load balancer in the cloud – similar to how AWS users interact with Elastic Load Balancing in EC2.
As the title mentions, this application can be made as an Eucalyptus Machine Image (EMI), and used in Eucalyptus as a load balancer. This blog entry will focus on the creation of the KVM EMI from a VirtualBox (VDI) image. Since the Zen Load Balancer is an appliance based off of Debian, it was really straight-forward to convert to an EMI. A follow-up blog entry will discuss how to use the appliance in Eucalyptus to load balance traffic for a group of instances (e.g. HTTP/HTTPS traffic).
Creating the VirtualBox Image
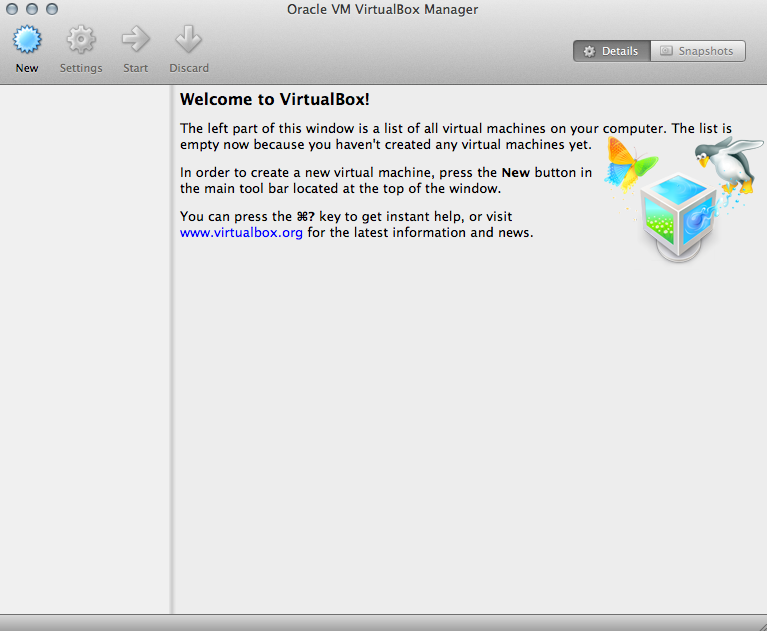
To create the raw disk image needed for the EMI in Eucalyptus, I used VirtualBox on my machine, which is a MacBook Air running Mac OS X 10.8.2. After downloading and installing VirtualBox, I went through the following steps to create a Zen Load Balancer VirtualBox image:
I started up VirtualBox and I am presented with the following Window: VirtualBox Welcome GUI
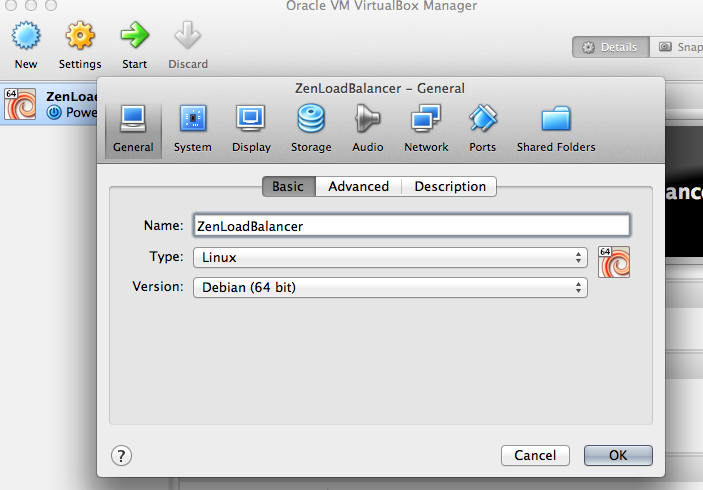
Select “New” in the upper right-hand corner of the screen, and the GUI below will be displayed. In this example, the name of the VM will be “ZenLoadBalancer”, the type is “Linux”, and the version is “Debian (64-bit). Select “Continue” after the fields have been filled in.
VirtualBox UI to select Name and Operating System
Select the amount of RAM need for the VM. In this example, I used 1024 MB. Select “Continue”.
Create Virtual Machine UI – Memory Size
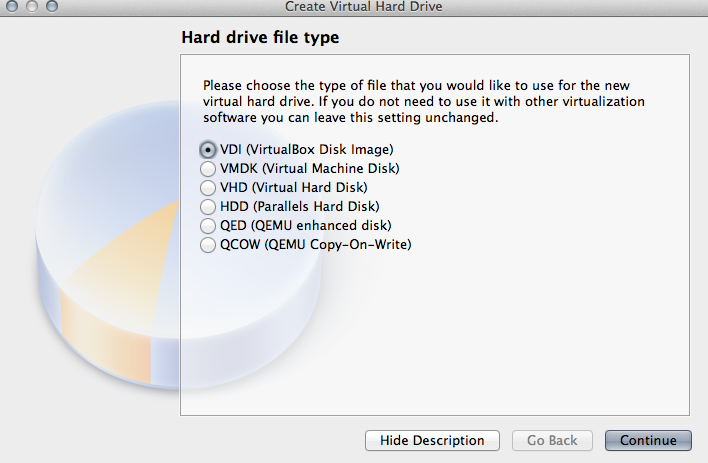
Select the hard drive file type. Here, I selected VirtualBox Disk Image (VDI). Select “Continue” once a selection has been made.
Select Hard Drive File Type
Select to make the physical hard drive fixed, then select “Continue”.
Select Fixed or Dynamic Hard Drive Type
Select the name of the VM image file, and the size of the image. In this example, the name is “ZenLoadBalancer” using the default location for storing the image, and 3 Gigs was allocated for the image.
Create Virtual Hard Drive – Location and Size
Now we need make sure that the network interface is configured and to add the Zen Load Balancer ISO as a CD-ROM device to the VM. To configure these options, start with the Basic Configuration GUI.
ZenLoadBalancer – Basic Configuration GUI
Select the “Network” Icon in the top menu. Select “Adapter 1”, and make sure “Enable Network Adapter” is set. Set “Attached to:” to “Bridged Adapter”, and select the adapter that the bridge will be connected to. In this example, its en0. Make sure no other adapters are enabled. This is important for creating the EMI from this VM.
Configuring Network Adapter – ZenLoadBalancer
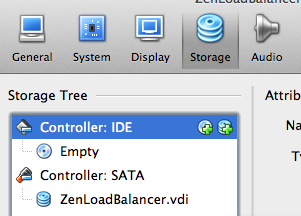
Select the “Storage” icon in the menu. Select the “+” sign next to “Controller:IDE” in the right-hand sidebar.
Adding New IDE
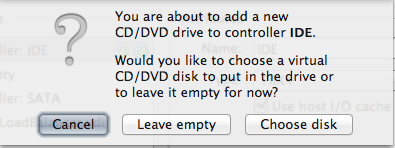
Confirm to add new CD/DVD drive to controller IDE by selected ‘Choose disk’, then select the Zen Load Balancer ISO. Select “Open”. Select “OK” on the main menu when the IDE has been attached.
Confirming adding new controller IDESelecting ZenLoadBalancer ISO
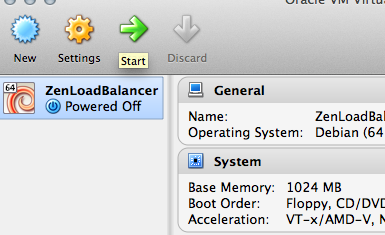
Its now time to power on the VM. Select “Start” in the main GUI.
Starting the VM
The Zen Load Balancer boot-up screen will be presented.
Zen Load Balancer Splash Screen
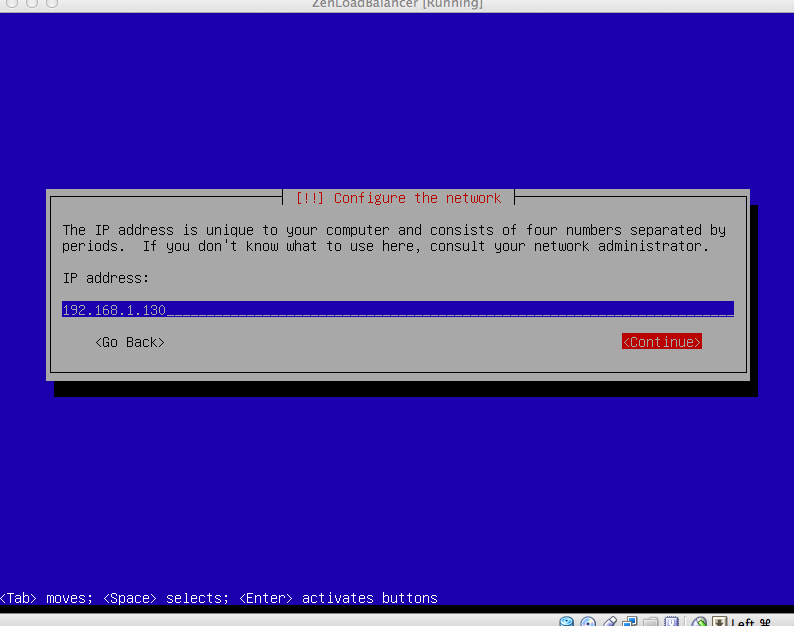
Select “Install”, and begin the static network configuration on the appliance. In this example, I select 192.168.1.130 as the IP for the VM, and 192.168.1.1 as my gateway. Even though this is static, we will use some /etc/rc.local magic to dynamically change this information per instance when its used as an EMI.
Configuring Static IP
After completing those steps, the command-line prompt will be presented.
Zen Load Balancer Log-In Prompt
Log into the VM, and install the latest linux-headers-*-amd64, linux-image-*-amd64, curl, and isc-dhcp-client using apt.
To make sure that the image can take advantage of using VirtIO, add “virtio”, “virtio_pci”, “virtio_net” and “virtio_blk” virtio modules to the /etc/initramfs-tools/modules file, then run
update-initramfs -u
We have finished all the prep work for the image. Now, we just stop the VM, and get ready to convert this VDI to an EMI.
Creating the Eucalyptus Machine Image
After stopping the VirtualBox VM, we are now ready to convert it to an EMI. Since the VirtualBox VM image is a VDI, we need to pull out the root filesystem from the raw disk image, and use that as the EMI.
To get us started, lets convert the VDI to a raw image. On my MacBook Air, I opened up good ol’ iTerm. and ran the following command:
We need to grab the root file system out. Since I wanted to use parted to figure out which section of the image I needed to pull out using dd, I moved the image to the frontend of my Eucalyptus cloud – which is running on CentOS 6.3. Once I had it on that machine, I ran parted on the image. The output looks like the following:
# sudo parted ZenLoadBalancer.img

GNU Parted 2.1

Using /root/ZenLoadBalancer.img

Welcome to GNU Parted! Type 'help' to view a list of commands.

(parted) u

Unit?  [compact]? b

(parted) p

Model:  (file)

Disk /root/ZenLoadBalancer.img: 3221225472B

Sector size (logical/physical): 512B/512B

Partition Table: msdos

Number  Start        End          Size         Type      File system     Flags

1      1048576B     3034578943B  3033530368B  primary   ext3            boot

2      3035626496B  3220176895B  184550400B   extended

5      3035627520B  3220176895B  184549376B   logical   linux-swap(v1)
(parted)
As you can see, the root file system is in partition 1. Note the values for “Start” and “Size” (in this example, the start is 1048576B and the Size is 3033530368B). This is what you will need to use with dd to pull out the root file system. When using dd, the bs option can be used to speed up the process. In this example, I used bs=512. Since I used that, I had to divide that against the “Start” and “Size” values, and use those values for “skip” and “count”. The root filesystem that I pull out will be called “ZenLB-rootfs.img”.
After it completes, I will end up with ~3 Gig image:
# du -sh ZenLB-rootfs.img2.9G ZenLB-rootfs.img
Next, I need to mount the root device to the loopback to do some additional preparations to the root filesystem, and get the ramdisk and kernel. Mount the image (in this example, I used /mnt/debian):
# sudo mount -o loop ZenLB-rootfs.img /mnt/debian

# sudo mount -o bind /proc /mnt/debian/proc

# sudo mount -o bind /sys /mnt/debian/sys

# sudo mount -o bind /dev /mnt/debian/dev

# sudo mount -o bind /dev/pts /mnt/debian/dev/pts
Now, we have to edit /etc/network/interfaces to make sure when the eth0 interface is activated, it uses dhcp. Add the following to the /etc/network/interfaces file:
We need to add one more edit to the /etc/rc.local file. This addition allows us to configure the Zen Loadbalancer application using the metadata service provided by Eucalyptus. With your favorite editor (e.g. vi, emacs, nano, etc.), open up /etc/rc.local, and add the following lines before the “exit 0”:
# set IP information for ZenLoadBalancer

ZENLB_GATEWAY="`route -n | grep UG | awk '{print $2}'`"

ZENLB_IP_INFO="eth0::${META_IP}:255.255.255.0:${ZENLB_GATEWAY}:up::"

echo ${ZENLB_IP_INFO} > /usr/local/zenloadbalancer/config/if_eth0_conf

echo "ZenLoadBalancer IP/Gateway Configuration:"

echo "****************************************"

cat /usr/local/zenloadbalancer/config/if_eth0_conf

echo "****************************************"

ZENLB_GATEWAY="`route -n | grep UG | awk '{print $2}'`"

sed --in-place 's/$defaultgw="192.168.1.1";/$defaultgw="${ZENLB_GATEWAY}";/' /usr/local/zenloadbalancer/config/global.conf


# start zenloadbalancer

/etc/init.d/zenloadbalancer start
Exit out of the chroot environment by typing “exit”. Copy the ramdisk and kernel from the boot directory where the image is mounted (i.e. /mnt/debian/boot):
Now that we have the root filesystem image, kernel and ramdisk, lets prepare these images to be bundled, uploaded and registered using eustore. Create a directory for these images (in this example, ZenLoadBalancer), and a directory inside that directory for the kernel and ramdisk. To work with eustore, the directory needs to have the name format “hypervisor type”-kernel. Since we are using KVM, the directory created is “kvm-kernel”.
mkdir -p ZenLoadBalancer/kvm-kernel
Move the root filesystem image (ZenLB-rootfs.img) into the ZenLoadBalancer directory, and then move the kernel and ramdisk into the ZenLoadBalancer/kvm-kernel directory. *NOTE*Make sure the images are owned by the current user if you are not the root user. This can be done using “chown”. After moving the images to those locations, the layout should look similar to the following:
# ls ZenLoadBalancer/*

ZenLoadBalancer/ZenLB-rootfs.img

ZenLoadBalancer/kvm-kernel:

initrd.img-2.6.32-5-amd64  vmlinuz-2.6.32-5-amd64
Now all we have to do is tar-gzip up the ZenLoadBalancer directory:
# tar -zcvf \
ZenLoadbalancer-x86_64.tgz ZenLoadBalancer
Use eustore to bundle, upload, and register the ramdisk (ERI), kernel (EKI) and root filesystem image (EMI):
Test the Zen LoadBalancer Eucalyptus Machine Image
We are now ready to test out the newly bundled image. Make sure and source your Eucalyptus creds (i.e. source .eucarc) so that we can create a security group for the load balancer, and then launch the image.
First, create the security group, and authorize ports for SSH (22), ping (ICMP), and ZenLoadBalancer admin UI (444).
# euca-create-group zenloadbalancer -d "Security Group for Zen Loadbalancer"

GROUP zenloadbalancer Security Group for Zen Loadbalancer

# euca-authorize -P tcp -p 22 -s 0.0.0.0/0 zenloadbalancer

GROUP zenloadbalancer

PERMISSION zenloadbalancer ALLOWS tcp 22 22 FROM CIDR 0.0.0.0/0

# euca-authorize -P tcp -p 444 -s 0.0.0.0/0 zenloadbalancer

GROUP zenloadbalancer

PERMISSION zenloadbalancer ALLOWS tcp 444 444 FROM CIDR 0.0.0.0/0

# euca-authorize -P icmp -t -1:-1 -s 0.0.0.0/0 zenloadbalancer

GROUP zenloadbalancer

PERMISSION zenloadbalancer ALLOWS icmp -1 -1 FROM CIDR 0.0.0.0/0

# euca-describe-group zenloadbalancer

GROUP 345590850920 zenloadbalancer Security Group for Zen Loadbalancer

PERMISSION 345590850920 zenloadbalancer ALLOWS tcp 22 22 FROM CIDR 0.0.0.0/0

PERMISSION 345590850920 zenloadbalancer ALLOWS tcp 444 444 FROM CIDR 0.0.0.0/0

PERMISSION 345590850920 zenloadbalancer ALLOWS icmp -1 -1 FROM CIDR 0.0.0.0/0
Now, lets launch an instance under the “zenloadbalancer” group.
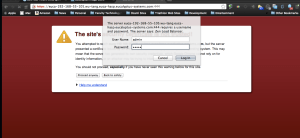
Zen Load Balancer Admin UI LoginLanding Page – Zen Load Balancer Admin UI
And thats it. You now have an Open Source Load Balancer ready for cloud use. The follow-up blog to this will show how to use the Zen Load Balancer in Eucalyptus. Hope you found this helpful. Enjoy!
We are issuing a challenge to the Open Source community. The challenge is called the “Recipe of the Month Challenge”.
The Rules:
Documentation on what application(s) the recipe deploys and how to use it. This also includes what is the purpose of the application(s). (Documentation should be easy to follow and straight-forward. This will help with the judging and testing of the recipe)
Any scripting language/configuration management software can be used. Some examples are as follows:
The following categories will be used for judging [scale from 1 (lowest) to 10 (highest):
Complexity (the more simple and elegant, the better)
Deployment speed/efficiency
Failure resiliency (how quickly can the solution return to a healthy operational state after an outage)
Creativity
Available swag awards:
Eucalyptus Hoodie (color available – dark grey)
Eucalyptus Electric Cloud Shirt (colors available – black or white)
Eucalyptus Contributor’s Coffee Mug
Various Eucalyptus stickers
The winning recipe will be made available on the Eucalyptus Recipes Github repository. Submissions will be accepted at the beginning of each month. All submissions must be made to the Recipes mailing list. The last day allowed for submissions will be the 25th of the month (this allows us time to test out each recipe and grade accordingly). Feel free to use the Eucalyptus Community Cloud as a testbed for your cloud recipe. Results announcing the winner will be posted to the Recipes, Images, and Eucalyptus Open Community mailing lists (for more information concerning the mailing lists, please visit the Eucalyptus Mailing Lists page).
Look forward to seeing the recipes. Remember, its all about creativity, deployment speed, and failure resiliency. Please send all questions, suggestions, additional ideas to the Recipes Mailing list.
Recently, I was given the task/honor of setting up an OpenLDAP server to be used for the enterprise. In the past, I have set up a few OpenLDAP servers – some built from source; others from packages. This time, it was different. Back in early May, I went to UDS in Oakland, California. When I was there, I sat in on a track where Howard Chu presented MDB: A Memory-Mapped Database and Backend for OpenLDAP. Every since then, I was inspired to deploy an OpenLDAP server utilizing MDB – which also gave me a chance to play around with Overlays. This blog will give a breakdown of what steps were taken to deploy an OpenLDAP server from source, using MDB backends – utilizing a few overlays.
Prerequisites
First off, we need to get the source code for the latest version of OpenLDAP. Go to the Downloads link on the OpenLDAP home page. Once there, grab any one of the links there and use wget/curl to download the tar-gzipped file.
These were used based upon the features to be utilized with OpenLDAP. To learn more about what features can be used with OpenLDAP, use the configure command to get some help:
cd openldap-2.4.31; ./configure --help
Configure, Build, Install
After determining what features will be used with OpenLDAP, its time to configure the build. Here is an example of running the configure command:
Create passwords for admin user for config database, and Directory Manager for main directory by using slappasswd:
/opt/openldap-2.4.31/sbin/slappasswd -h {SSHA} (Run this for each password to be created.)
Now we need to configure the server. We will be using the on-line configuration (OLC) of slapd (instead of the old configuration way – slapd.conf. OLC provides close to zero down-time configuration, cn=config and slapd.d directory. For more information concerning usage of cn=config, please refer to Configuring slapd in the online OpenLDAP Administrator’s Guide.
# Frontend settings
#
dn: olcDatabase=frontend,cn=config
objectClass: olcDatabaseConfig
olcDatabase: frontend
olcAccess: to dn.base="" by * read
olcAccess: to dn.base="cn=Subschema" by * read
olcAccess: to *
by self write
by users read
by anonymous auth
#######################################################################
# MDB database definitions
#######################################################################
#
dn: olcDatabase=mdb,cn=config
objectClass: olcDatabaseConfig
objectClass: olcMdbConfig
olcDatabase: mdb
olcSuffix: dc=example,dc=com
olcRootDN: cn=Directory Manager,dc=example,dc=com
olcRootPW: {SSHA}xxxxxxxxxxxxxxxxxxxxxx
olcDbDirectory: /opt/openldap-2.4.31/var/openldap-data/main
olcDbIndex: objectClass eq
olcAccess: to attrs=userPassword by dn="cn=Directory Manager,dc=example,
dc=com" write by anonymous auth by self write by * none
olcAccess: to attrs=shadowLastChange by self write by * read
olcAccess: to dn.base="" by * read
olcAccess: to * by dn="cn=Directory Manager,dc=example,dc=com" write by
* read
olcDbMaxReaders: 0
olcDbMode: 0600
olcDbSearchStack: 16
olcDbMaxSize: 4294967296
olcAddContentAcl: FALSE
olcLastMod: TRUE
olcMaxDerefDepth: 15
olcReadOnly: FALSE
olcSyncUseSubentry: FALSE
olcMonitoring: TRUE
olcDbNoSync: FALSE
olcDbEnvFlags: writemap
olcDbEnvFlags: nometasync
Schema Information
In the schema section, the following LDIFs were included:
collective => Collective attributes
corba => Corba Object
core => OpenLDAP “core”
cosine => COSINE Pilot
duaconf => Client Configuration
dyngroup => Dynamic Group
inetorgperson => InetOrgPerson
misc => Miscellaneous Schema
nis => Network Information Service
openldap => OpenLDAP Project
ppolicy => Password Policy Schema
For more information about the schema configuration, please refer to the following links:
The Rewrite Overlay uses the slapo-rwm overlay and the relay proxy backend. This overlay/backend combo will allow “dc=example,dc=com” or “o=example” to be used by ldap tools, such as ldapsearch.
To implement this, create an LDIF file with the following information
The auditing overlay is great for security audits. For a given database, an LDIF file is created of all ldap operations completed against the database. This is also helpful for disaster recovery as well.
Since the config database and the main mdb database (dc=example,dc=com) will be accessed the most, lets create an audit overlay for them. To do so, add the following information to an LDIF:
There will now be an ldif file for each database under /var/log/ldap directory.
Access Log Overlay
The accesslog overlay is another overlay that is implemented with data storage database. This overlay allows the Directory Manager to see all successful ldap modifies, deletes, searches, adds against the main directory (dc=example,dc=com). This information can be accessed using ldapsearch. There is the ability to implement log purging as well. In this setup, any logs older than 7 days will be deleted. Since the database will be stored under /opt/openldap-2.4.31/var/openldap-data/access, we need to make sure and create that directory, and set the ownership to the openldap user:
When I finished my last blog, I realized I left out a key group of developers on Mac OS X. I didn’t want to leave out my Homebrew fans, so this blog is dedicated to the brew users out there in the world. For those who don’t know, Homebrew is an alternative package manager to MacPorts on the Mac OS X platform. I am a MacPorts person myself, but I always believe that you should challenge yourself by learning different tools.
Next, we need to change Lion’s symlink to point to the new Python installation. Run the following commands:
cd /System/Library/Frameworks/Python.framework/Versions/

sudo rm -rf Current

sudo ln -s /usr/local/Cellar/python/2.7.3/Frameworks/Python.framework/Versions/Current
Next we install Pip. This also is referenced in the blog. To install Pip, run the following command:
easy_install pip
After Pip is done installing, its time to install virtualenv:
pip install virtualenv
From here on out, you just need to reference my previous blog, starting from the section “Setting Up Your Virtual Env and Installing the Required Modules”.
As always, I hope you enjoyed this blog. On to more Eutester-ing…
In the Eutester Basics Part 2 blog entry, the development environment is focused on being set up on an Ubuntu system. To share the Eutester wealth, the steps documented in the blog have been modified to address setting up a development environment on Mac OS X Lion.
Prerequisites
This blog assumes the following has been installed:
Once the prereqs are set, its on to setting up the environment.
Dependencies
As stated in the Eutester Basics Part 2 blog, Python 2.6 is required. Python 2.7 will be used in this setup. In addition to Python 2.7, we need to make sure that py27-distribute (Replacement for setuptools) and py27-virtualenv (Virtual Python Environment builder) are installed as well. Run the following command to install these packages via MacPorts:
sudo port install python27 py27-distribute py27-virtualenv
Setting Up Your Virtual Env and Installing Required Modules
Now we are ready to set up things up for Eutester.
Create the virtual Python environment:
virtualenv eutester-dev
Enter the environment that was just created:
source eutester-dev/bin/activate
Install required modules. Here I will deviate a bit and install ipython as well:
easy_install ipython readline boto paramiko
Since Mac OS X Lion includes git, we can go ahead and download eutester:
Navigate to the eutester directory, and install eutester using ipython:
cd eutester; ipython setup.py install
From here on out, just follow the instructions under the sections “Setting up your Eucarc file” and “Configuring Python shell for tab complete and history” in the Eutester Basics Part 2 blog.
When you are ready to start the virtual Python environment, instead of using python, use ipython instead:
./Desktop/eutester-dev/bin/ipython
In my opinion, ipython makes it a bit easier to develop eutester scripts in an interactive environment. The real power is with the “?” feature. If you aren’t sure what arguments a given method accepts, just use the “?”:
(eutester-dev)Nodachi-2:~ hspencer$ ./Desktop/eutester-dev/bin/ipython

Python 2.7.3 (default, Apr 14 2012, 19:55:34)

Type "copyright", "credits" or "license" for more information.
IPython 0.12 -- An enhanced Interactive Python.
? -> Introduction and overview of IPython's features.
%quickref -> Quick reference.
help -> Python's own help system.
object? -> Details about 'object', use 'object??' for extra details.
In [1]: from eucaops import Eucaops
In [2]: tester = Eucaops(credpath="/Users/hspencer/Desktop/eutester-dev")
[2012-04-15 16:51:10,392] [EUTESTER] [DEBUG]: Extracting keys from /Users/hspencer/Desktop/eutester-dev
In [3]: tester.get_current_resources(?
Type: instancemethod
Base Class: <type 'instancemethod'>
String Form:<bound method Eucaops.get_current_resources of <eucaops.Eucaops object at 0x107b99b50>>
Namespace: Interactive
File: /Users/hspencer/Desktop/eutester-dev/lib/python2.7/site-packages/eutester-0.0.1-py2.7.egg/eucaops/__init__.py
Definition: tester.get_current_resources(self, verbose=False)
Docstring:
Return a dictionary with all known resources the system has. Optional pass the verbose=True flag to print this info to the logs
Included resources are: addresses, images, instances, key_pairs, security_groups, snapshots, volumes, zones
High availability for applications and physical machines is key to having services “appear” to never be down. With cloud computing, deploying failure resilient applications is needed for services that need to be always available.
The purpose of this blog is to provide more of the technical information for HA Open iSCSI that good friend and colleague, Lester, mentioned in his blog. Our goal was to setup HA with Open iSCSI without access to a SAN. To accomplish this, we used Pacemaker, Open iSCSI, and DRBD. The great guys from Linbit provided us with the documentation to deploy this environment.
Resource Group: rg_clustervol
p_lvm_clustervol (ocf::heartbeat:LVM): Started viking-07.eucalyptus-systems.com
p_target_clustervol (ocf::heartbeat:iSCSITarget): Started viking-07.eucalyptus-systems.com
p_lu_clustervol_lun1 (ocf::heartbeat:iSCSILogicalUnit): Started viking-07.eucalyptus-systems.com
p_ip_clustervolip (ocf::heartbeat:IPaddr2): Started viking-07.eucalyptus-systems.com
Master/Slave Set: ms_drbd_clustervol
Masters: [ viking-07.eucalyptus-systems.com ]
Slaves: [ viking-08.eucalyptus-systems.com ]
Installation
The installation instructions are pretty straight forward. The instructions will be the same for both machines – unless otherwise noted. These instructions assume that CentOS 5.7 has already been installed. If CentOS 5.7 is not already installed, please go to the CentOS 5 Documentation for installation instructions.
Both Nodes
Installing SCSI Target Framework
The SCSI Target Framework (tgt) is needed for the iSCSI servers we will use in the cluster setup. To install, run the following command:
yum install scsi-target-utils
Once you have done this, make sure that the tgtd service is part of the system startup:
/sbin/chkconfig tgtd on
Installing Pacemaker cluster manager
Pacemaker is an open source, high availability resource manager. The packages for the Pacemaker project are provided by clusterlabs.org. To install Pacemaker, do the following:
Download the clusterlabs.repo file with wget or curl to the /etc/yum.repos.d directory:
Make sure pacemaker is part of the system startup:
/sbin/chkconfig corosync on
Install DRBD
DRBD provides us the storage backend for the cluster. It mirrors the data written to the disk to the peer node. For more information about what DRBD does, refer to the Mirroring section on the DRBD site. To install DRBD, run the following command:
yum install drbd83 kmod-drbd83
Configuration
Configure DRBD resource
In order to configure DRBD, we need to create and edit a resource file clustervol.res under /etc/drbd.d on both nodes. One thing to note here, we used a separate device (/dev/sdd2) that uses LVM to be utilized by DRBD (for syncing the content served up by tgtd). We did this to make it easier for recovery of disks in case of failure.
Both Nodes
First use an editor (such as VI) to open the file clustervol.res under /etc/drbd.d:
vi /etc/drbd.d/clustervol.res
Edit the file accordingly to match the environment. Our resource file looks like the following:
on viking-07.eucalyptus-systems.com {
address 192.168.39.107:7790;
}
on viking-08.eucalyptus-systems.com {
address 192.168.39.108:7790;
}
}
The main parts of the configuration file are as follows:
resource – refers to the resource managed by DRBD
disk – refers to the device that DRBD will use
address – IP Address/port that DRBD will use
For performance gains for disk syncing and failover responsiveness, DRBD can be configured to match those needs. For more information on configuring DRBD, please refer to the sections Configuring DRBD and Optimizing DRBD performance of the DRBD 8.3 User’s Guide. This document is a *must have* as a reference source. I suggest reading it and trying out different configurations before putting any service using DRBD in a production environment.
LVM Configuration
There are a few ways that LVM can be utilized with DRBD. They are as follows:
For our setup, we configured a DRBD resource as a Physical Volume, as as described in the documentation provided by Linbit. For more information concerning using LVM with DRBD, please refer to section entitled Using LVM with DRBD in the DRBD 8.3 User’s Guide.
We need to make sure to instruct LVM to read the Physical Volume signatures from the DRBD devices only.
Both Nodes
Configure LVM to look at Physical Volume signatures from DRBD devices only by editing the /etc/lvm/lvm.conf file:
filter = [ "a|/dev/drbd.*|", "r|.*|" ]
Disable LVM cache (in /etc/lvm/lvm.conf):
write_cache_state = 0
After disabling the LVM cache, make sure to remove any stale cache entries by deleting the /etc/lvm/cache/.cache
After this is done on both nodes, we need to create an LVM Volume Group by initializing the DRBD resource as an LVM Physical Volume. In order to do so, creation of the metadata for the resource is needed. Our resource name is clustervol.
Both Nodes
Run the following command:
# drbdadm create-md clustervol

Writing meta data...

initializing activity log

NOT initialized bitmap

New drbd meta data block successfully created.
Next, put the resource up:
# drbdadm up clustervol
Primary Node
Now we need to do the initial sync between the nodes. This needs to be done on the primary node. For us, this is viking-07:
Finally, we need to add a logical volume to represent the iSCSI Logical Unit (LUs). There can be multiple LUs, but in our setup, we created one 10 Gig logical volume for testing purposes. We created the LV with the following command:
Pacemaker is a cluster resource manager which handles resource level failover. Corosync is the messaging layer which handlers node membership in the cluster and node failure at the infrastructure level.
To configure Pacemaker, do the following:
Primary Node
Generate corosync key:
[root@viking-07 ~]# corosync-keygen
chmod authkey to read-only by root, then copy authkey file to the other node:
Now we are ready to configure the Active/Passive iSCSI cluster. The following cluster resources are needed for an active/passive iSCSI Target:
A DRBD resource to replicate data. This is controlled by the cluster manager by switching between the Primary and Secondary roles.
An LVM Volume Group, which will be available on whichever node currently holds the DRBD resource in Primary Role
A virtual, floating IP for the cluster. This will allow initiators to connect to the target no matter which physical node it is running on
iSCSI Target
At least one iSCSI LUs that corresponds to a Logical Volume in the LVM Volume Group
In our setup, the Pacemaker configuration has 192.168.44.30 as the virtual IP address to use the target with iSCSI Qualified Name (IQN)iqn.1994-05.com.redhat:cfd95480cf87.clustervol. (An important note here is to make sure both nodes have the same initiatorname. The initiatorname for this configuration is iqn.1994-05.com.redhat:cfd95480cf87. This information is in the /etc/iscsi/initiatorname.iscsi file.)
The target contains the Logical Unit with LUN1, mapping to the Logical Volume named lun1.
To begin with the configuration of the resource, open the crm shell as root, and issue the following commands on the Primary node (i.e. viking-07):
crm(live)# configure

crm(live)configure# primitive p_drbd_clustervol \

ocf:linbit:drbd \

params drbd_resource="clustervol" \

op monitor interval="29" role="Master" \

op monitor interval="31" role="Slave"

crm(live)configure# ms ms_drbd_clustervol p_drbd_clustervol \

meta master-max="1" master-node-max="1" clone-max="2" \

clone-node-max="1" notify="true"
Create a master/slave resource mapping to the DRBD resource clustervol:
To bring it all together, we need to create a resource group from the resource associated with our iSCSI target:
crm(live)configure# group rg_clustervol \

p_lvm_clustervol \

p_target_clustervol p_lu_clustervol_lun1 p_ip_clustervolip
The Pacemaker default for the resource group is ordered and co-located. This means resources contained in the resource group will always run on the same physical machine, will be started in the same order as specified, and stopped in reverse order.
To wrap things up, make sure that the resource group is started on the node where DRBD is in the Primary role:
We have now finished our configuration. All that is left to do is for it to be activated. To do so, run the issue the following command in the crm shell:
Resource Group: rg_clustervol
p_lvm_clustervol (ocf::heartbeat:LVM): Started viking-07.eucalyptus-systems.com
p_target_clustervol (ocf::heartbeat:iSCSITarget): Started viking-07.eucalyptus-systems.com
p_lu_clustervol_lun1 (ocf::heartbeat:iSCSILogicalUnit): Started viking-07.eucalyptus-systems.com
p_ip_clustervolip (ocf::heartbeat:IPaddr2): Started viking-07.eucalyptus-systems.com
Master/Slave Set: ms_drbd_clustervol
Masters: [ viking-07.eucalyptus-systems.com ]
Slaves: [ viking-08.eucalyptus-systems.com ]
A more complex test is to do an md5sum of a file (e.g. an ISO) and copy it from a desktop/laptop to the machine that has the iSCSI targeted mounted (e.g. viking-09). While the copy is happening, you can use the crm CLI to failover back and forth. You will see there is no delay. You can monitor the status of the cluster by using crm_mon. After the copy is complete, do an md5sum of the ISO on the machine to where it was copied. The md5sums should match.
The next phase of this blog will be to script as much of this install and configuration as possible (e.g. using Puppet or Chef). Stayed tuned to more information about this. Hope you enjoyed this blog. Let me know if you have questions, suggestions, and/or comments.
In my last blog, I covered three ways Eucalyptus Systems uses the Varnish-Walrus architecture. This blog will cover how eustore takes advantage of this architecture.
Options:
-h, --help show this help message and exit
-v, --verbose display more information about images
Standard Options:
-D, --debug Turn on all debugging output
--debugger Enable interactive debugger on error
-U URL, --url=URL Override service URL with value provided
--region=REGION Name of the region to connect to
-I ACCESS_KEY_ID, --access-key-id=ACCESS_KEY_ID
Override access key value
-S SECRET_KEY, --secret-key=SECRET_KEY
Override secret key value
--version Display version string
Options:
-h, --help show this help message and exit
-i IMAGE_NAME, --image_name=IMAGE_NAME
name of image to install
-b BUCKET, --bucket=BUCKET
specify the bucket to store the images in
-k KERNEL_TYPE, --kernel_type=KERNEL_TYPE
specify the type you're using [xen|kvm]
-d DIR, --dir=DIR specify a temporary directory for large files
--kernel=KERNEL Override bundled kernel with one already installed
--ramdisk=RAMDISK Override bundled ramdisk with one already installed
Standard Options:
-D, --debug Turn on all debugging output
--debugger Enable interactive debugger on error
-U URL, --url=URL Override service URL with value provided
--region=REGION Name of the region to connect to
-I ACCESS_KEY_ID, --access-key-id=ACCESS_KEY_ID
Override access key value
-S SECRET_KEY, --secret-key=SECRET_KEY
Override secret key value
--version Display version string
Eustore, by default, uses the images located on emis.eucalyptus.com. Eustore can be configured to use other locations for images. Eustore utilizes two components for image management:
The images found on emis.eucalyptus.com and the JSON configuration file associated with those images are all located in unique Walrus buckets. The images shown in this blog are in the starter-emis bucket. The ACLs for these buckets allow for the objects to be publicly accessible. For more information on Walrus ACLs, please reference the section “Access Control List (ACL) Overview” in the AWS S3 Developer’s Guide.
The two commands mentioned above that eustore provides – eustore-describe-images and eustore-install-images – significantly cuts down the number of commands needed to be input by the user. Without using eustore, a user would need to run 3 commands (euca-bundle-image, euca-upload-image, and euca-register) for the kernel, ramdisk, and raw disk image for an EMI (this translates to a total of 9 commands).
The Collaboration
eustore-describe-images
When eustore-describe-images is ran, the following occurs:
eustore-describe-images
eustore-describe-image requests information from JSON file (stored in Walrus bucket) from emis.eucalyptus.com (varnishd instance)
eustore-install-image follows the same steps as eustore-describe-images, except it uses the information stored in the JSON file for each EMI. The following information is present for each EMI:
When eustore-install-image -i centos-x86_64-20120114 -b centos_x86-64 is executed, the following occurs:
eustore-install-image
eustore-install-image requests image (which is in a tar-gzipped form) to be downloaded from emis.eucalyptus.com
** If image is not available (euca-centos-2012.1.14-x86_64.tgz) in varnish cache, then varnishd (emis.eucalyptus.com) will pull image from starter-emis bucket and store it in ephemeral space for caching to handle future requests.
Once the tar-gzipped file is downloaded, eustore-install-image will bundle, upload, and register the kernel (EKI), ramdisk (ERI) and image (EMI).
As demonstrated above, eustore definitely makes image management efficient and user-friendly. Stay tuned for upcoming blogs discussing more on how the Varnish-Walrus architecture is utilized.
For any questions, concerns, and/or suggestions, please email images@lists.eucalyptus.com or community@lists.eucalyptus.com. And as always, you can respond with comments here as well.:-)
Enjoy!
**This step won’t happen if the contents are cached on emis.eucalyptus.com
A few weeks ago, I posted a blog entitled “Fun with Varnish and Walrus on Eucalyptus, Part 1“. This blog will follow-up on my blog to showcase a few production use cases that utilize the Varnish–Walrus architecture built on top of Eucalyptus.*NOTE* This architecture can also be leveraged using AWS EC2 and S3. This is one of the many benefits of Eucalyptus being AWS compatible.
The tools and web pages that take advantage of the Varnish-Walrus architecture on Eucalyptus are the following:
Eustore uses the Varnish-Walrus architecture by pulling images through emi.eucalyptus.com (the varnish instance). The data for each of the images is stored in a JSON file located in a Walrus bukkit. For more information about Eustore, please refer to David Kavanagh’s Eustore blog.
The Starter Eucalyptus Machine Images (EMIs) page uses the Varnish-Walrus architecture to allow users to download all of the EMIs that can be downloaded. Starter Eucalyptus Machine Images (EMIs) Since emis.eucalyptus.com is a varnish instance, you can query logs there to get statistics on how many of each EMI has been downloaded.
The Eucalyptus Machine Images page is a static web page for emis.eucalyptus.com, which is comprised of HTML, CSS, and jQuery – which are all stored in a Walrus bukkit. Eucalyptus Machine Images Page The web page for emis.eucalyptus.com definitely shows the power of using Walrus as a data store for various information. It accesses the same JSON file that is used by Eustore. We did this to make sure that there is consistency with all tools and web pages that provide access to the EMIs we create.
Hope you enjoyed this introduction to the use cases we use here at Eucalyptus. Stay tuned to the follow-up blogs that provide a more in-depth view as to how each use case utilizes our Varnish-Walrus infrastructure.
Thanks to David Kavanagh and Ian Struble for helping in this endeavor. This blog would have been out sooner, but I was busy at Scale 10x working the booth for Eucalyptus Systems. To see the fun we had at the conference, check out the following tumblr posts:
1Eustore was designed by David Kavanagh, one of the many great colleagues I work with at Eucalyptus Systems. It initially started as a project idea that spurred from various image management needs discussed in the Eucalyptus Image Management group.
After getting some free time to put together a high-level diagram of the Varish/Walrus setup we are using at Eucalyptus Systems, I decided to use it as an opportunity to make it my first technical blog.
The Inspiration
Here at Eucalyptus Systems, we are really big on “drinking our own champagne“. We are in the process of migrating every-day enterprise services to utilize Eucalyptus. My good friend and co-worker Graziano got our team started down this path with his blog posts on Drinking Champagne and Planet Eucalyptus.
The Problem
We needed to migrate storage of various tar-gzipped files from a virtual machine, to an infrastructure running on Eucalyptus. Since Eucalyptus Walrus is compatible with Amazon’s S3, it serves as a great service for storing tons of static content and data. Walrus – just as S3 – also has ACLs for data objects stored.
With all the coolness of storing data in Walrus, we needed to figure out a way lessen the network load to Walrus due to multiple HTTP GET requests. This is where Varnish comes to the rescue…
The Solution
Above is the architectural diagram of how Varnishd can be set up as a caching service for objects stored in Walrus buckets. Varnish is primarily developed as an HTTP accelerator. In this setup, we use varnish to accomplish the following:
caching bucket objects requested through HTTP
custom URL naming for buckets
granular control to Walrus buckets
Bucket Objects in Walrus
We upload the bucket objects using a patched version of s3cmd. To allow the objects to be accessed by the varnish caching instance, we use s3cmd as follows:
Create the bucket:
s3cmd mb s3://bucket-name
Upload the object and make sure its public accessible:
s3cmd put --acl-public --guess-mime-type object s3://bucket-name/object
And thats it. All the other configuration is done on the varnish end. Now, on to varnish..
Varnishd Setup
The instance that is running varnish is running Debian 6.0. We process any request for specific bucket objects that come to the instance, and pull from the bucket where the object is located. The instance is customized to take in scripts through user-data/user-data-file option thats can be used by the euca-run-instance command. The rc.local script that enables this option in the image can be found here. The script we use for this varnish setup – along with other deployment scripts – can be found here on projects.eucalyptus.com.
Thats it! We can bring up another instance quickly without a problem – since it’s scripted..:-). We also use Walrus to store our configurations as well. For extra security, we don’t make those objects public. We use s3cmd to download the objects, then move the configuration files to the correct location in the instance.
We hope this setup inspires other ideas that can be implemented with Eucalyptus. Please feel free to give any feedback. We are always open to improve things here at Eucalyptus. Enjoy, and be on the look out for a follow-up post discussing how to add load balancing to this setup.